‘Tis the season for baked goods! Specifically pie (or pi…ha); apple, pumpkin, and cranberry tart. I’ve gone down a rabbit hole lately looking longingly at the Southern Living Magazine pies over the years and wondering how hell they make those detailed creations. I wanted to try it for myself and it is really not as hard as it looks! There are so many types of decoration styles that we are focusing on only 3 categories. The lattice, top-crust, and fruit with powdered sugar decoration. We made easy to achieve, and more importantly, easy to customize designs. Along the way we will share Pro Tips to make tackling the designs so much easier.
We used the Martha Steward Baking Handbook for all the crusts and fillings except for the fruit tart fulling which we may share in a separate post. Her recipes are tried and true and don’t call for any crazy ingredients. Martha knows her stuff so I just don’t even question it, ya know?!
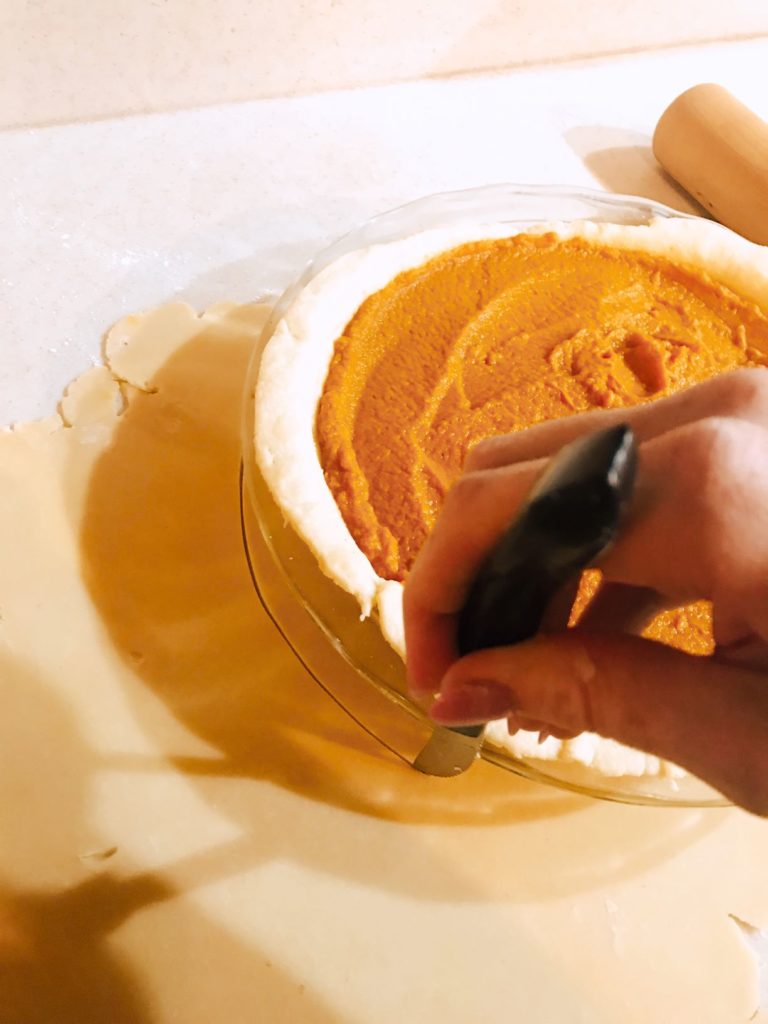
Prep your pie according to the recipe used and then pick up the below when ready to decorate!
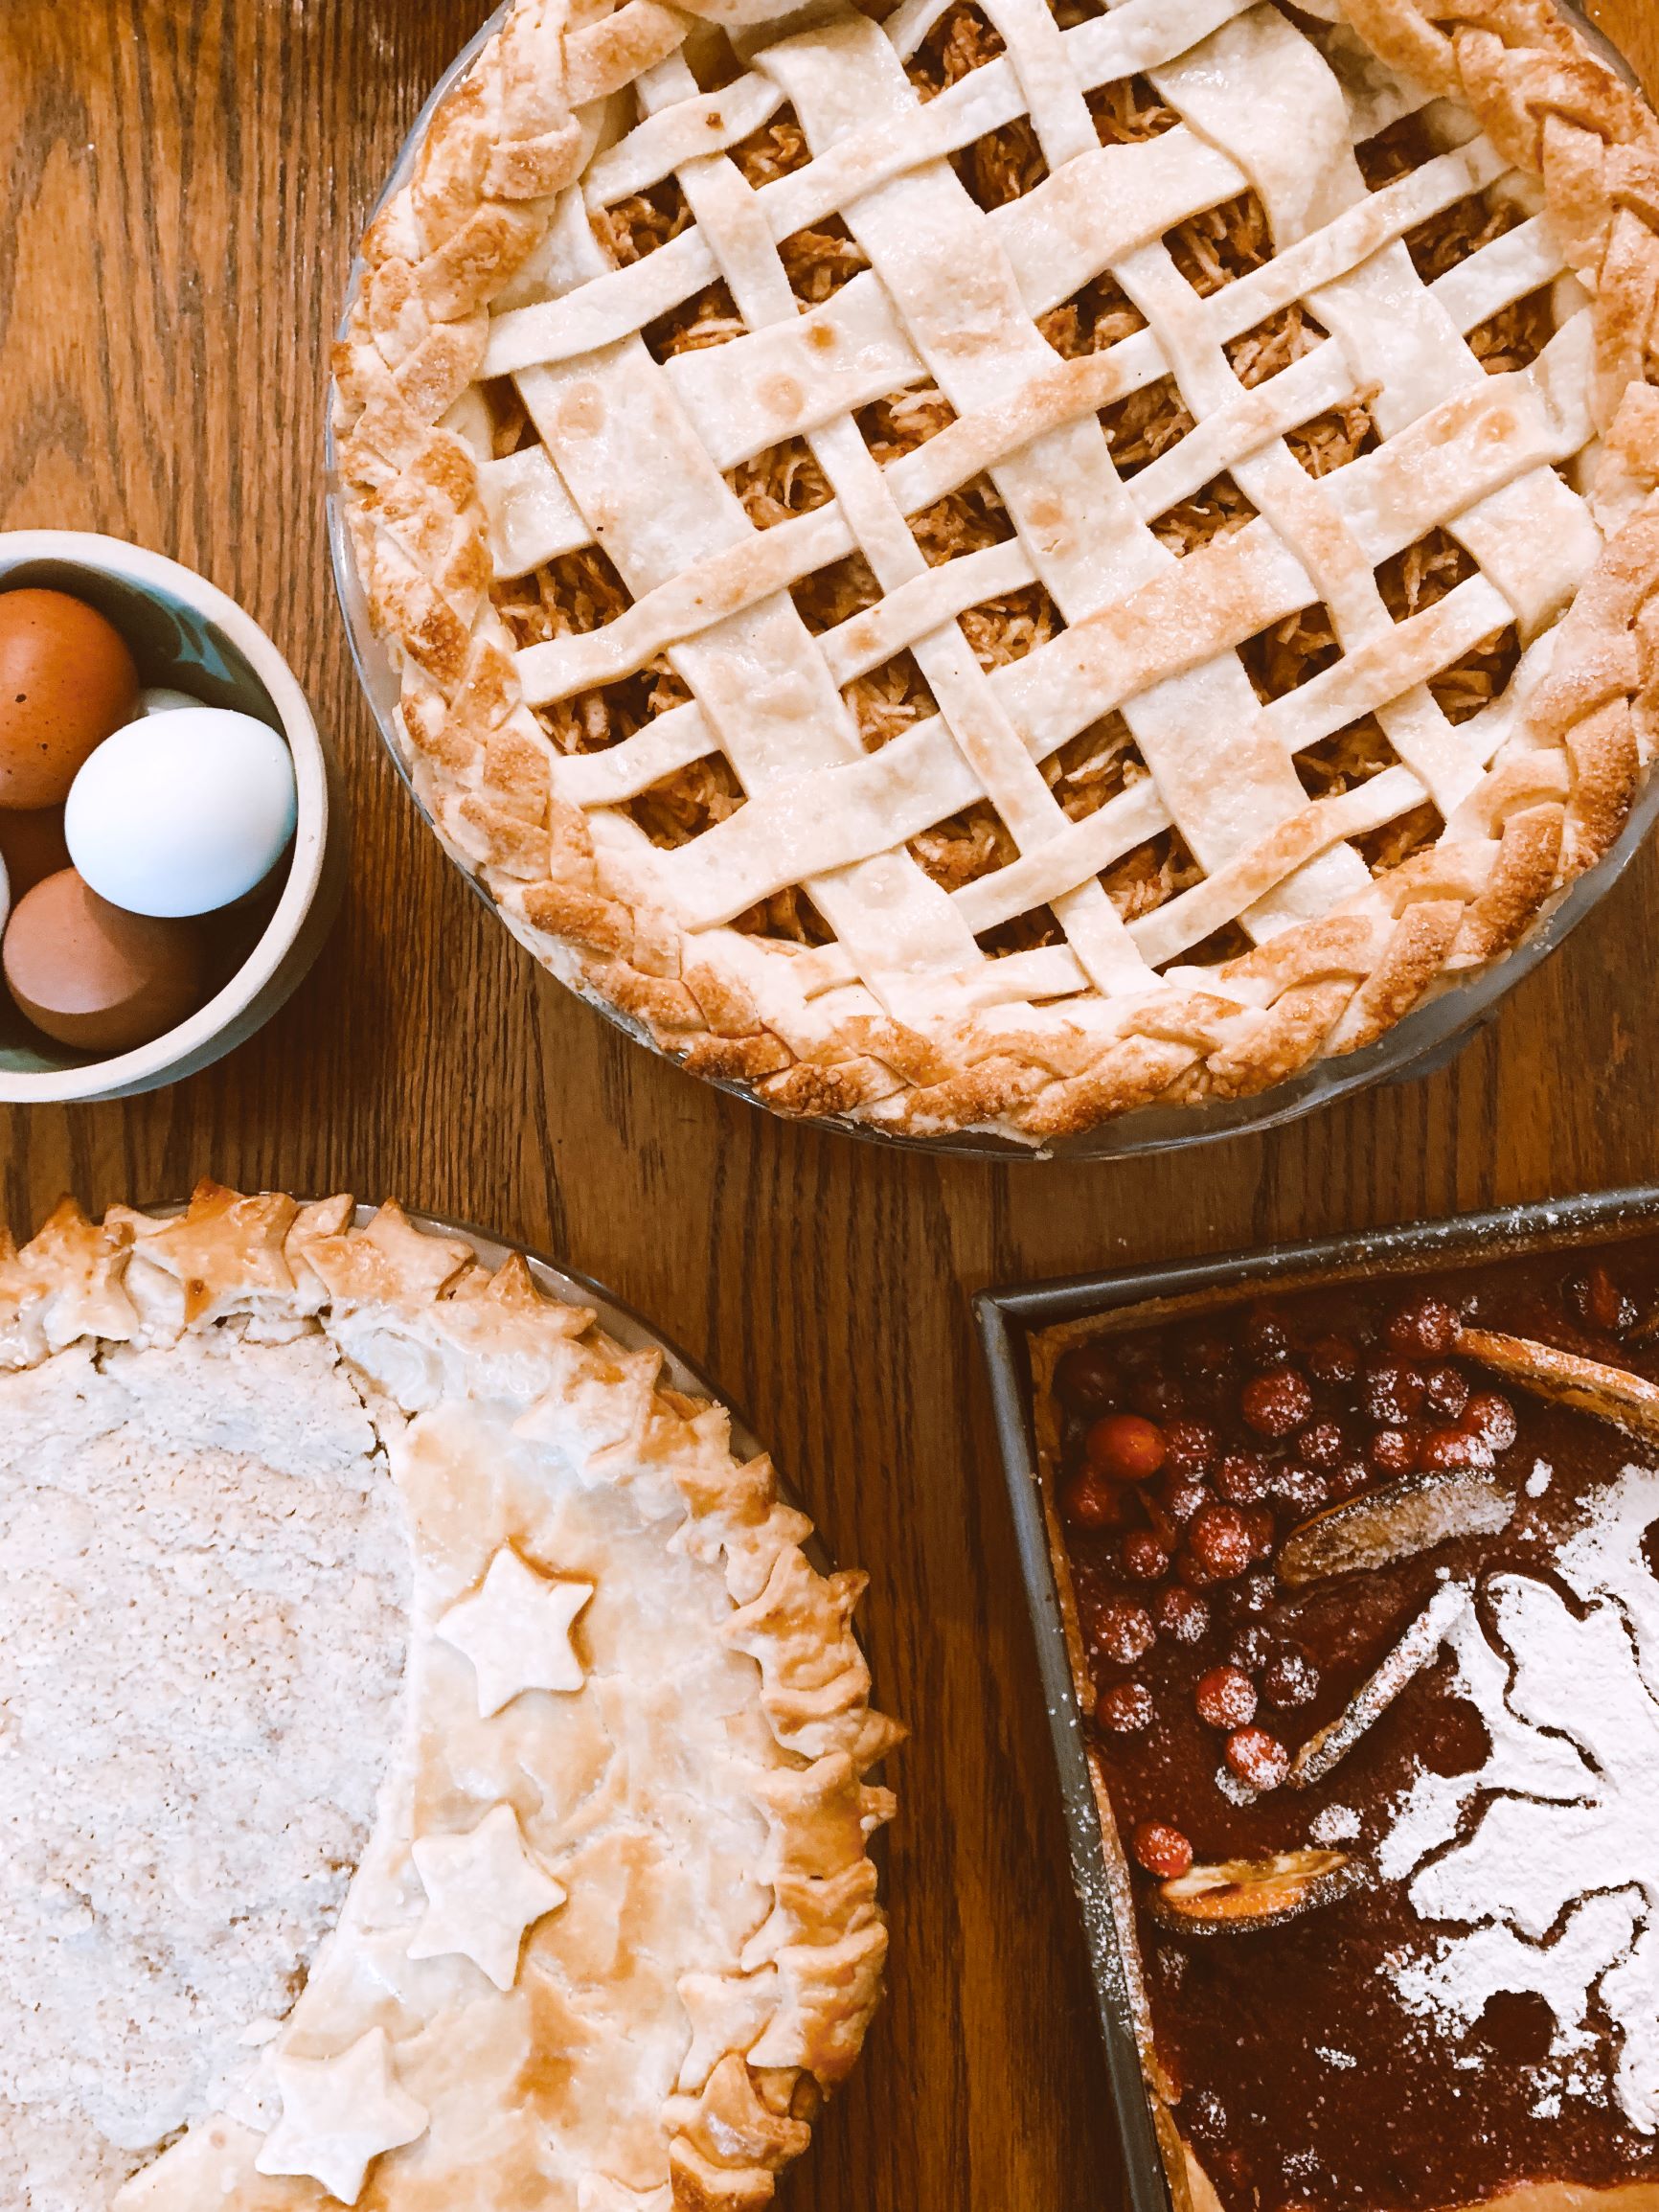
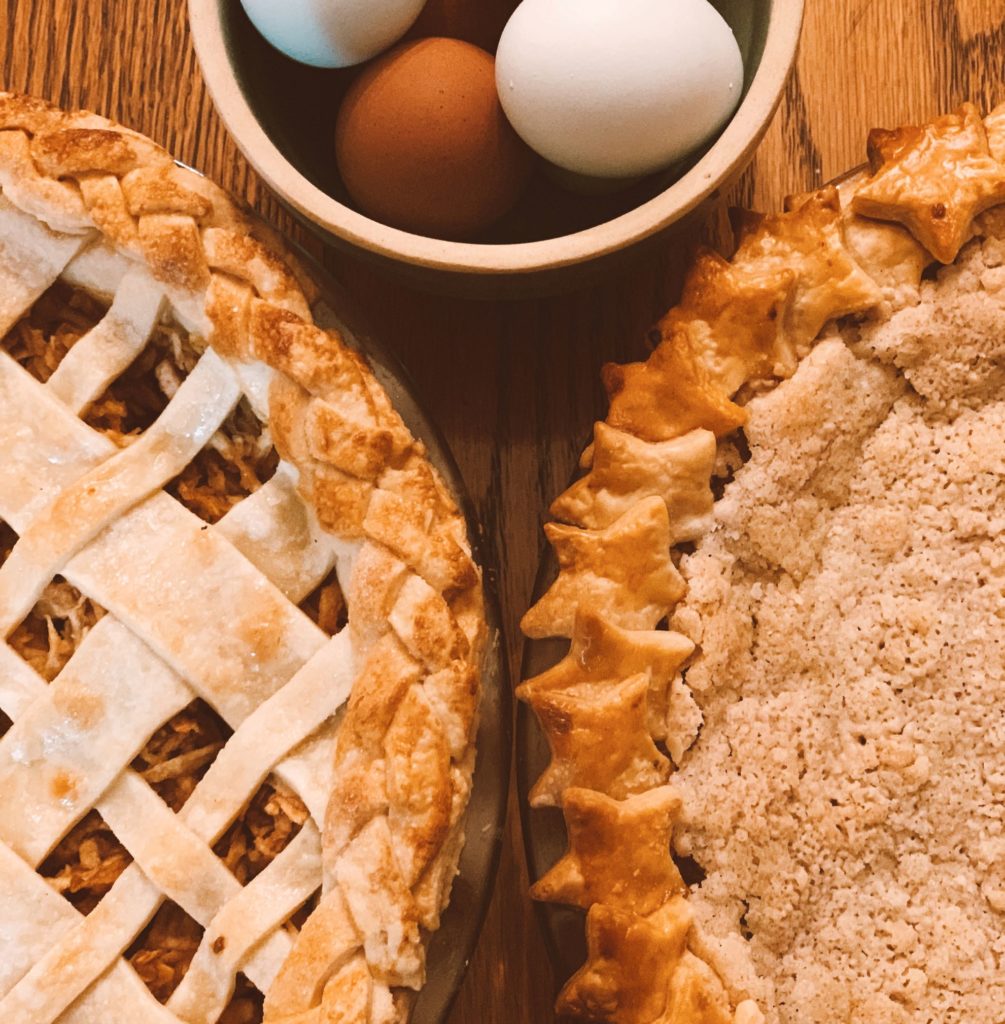
Lattice Top
Once pie base crust and filling are set up for your pie, I used apple pie, roll out your extra dough. Get it as thin as your base crust and grab a sharp knife and tray to lay cut pieces on.
Pro Tip: If making apple pie, shred the apples instead of slicing for a more even flavor and cooking. Make sure you drain excess liquid of the apples with this method!
Pro Tip: The pie dough should be stiff and cold as you work with it, that is what is keeping the shape since it is 30% butter. If it gets squishy or difficult to move without breaking during any step, put on a sheet and throw back in fridge for 30 minutes.
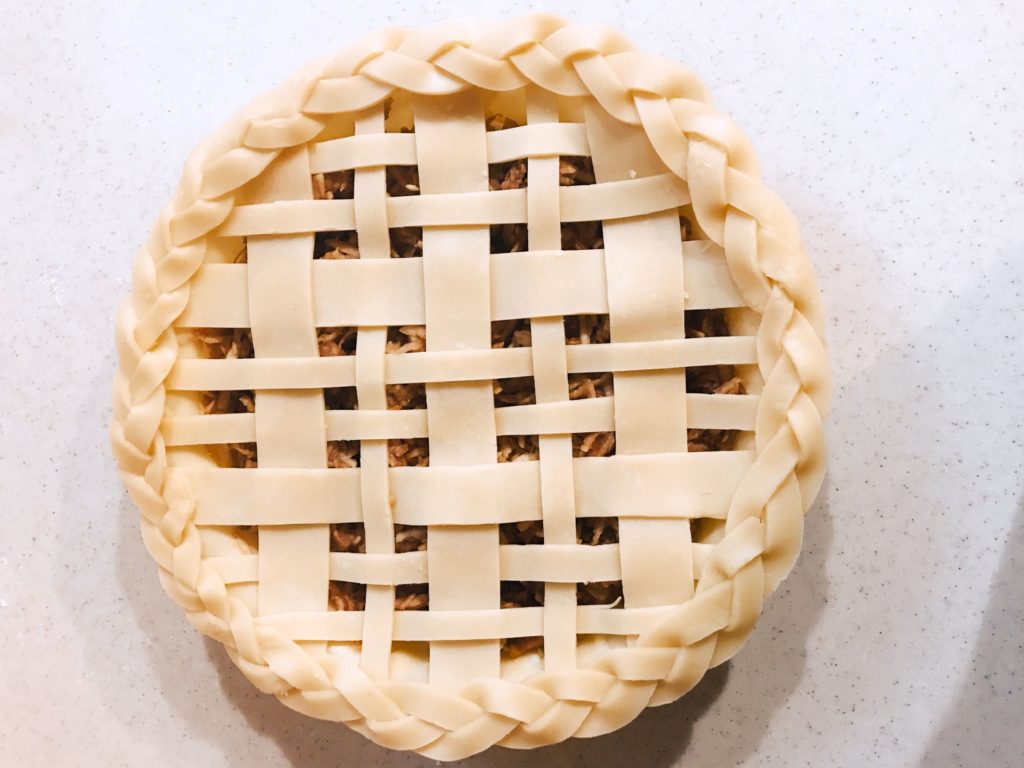
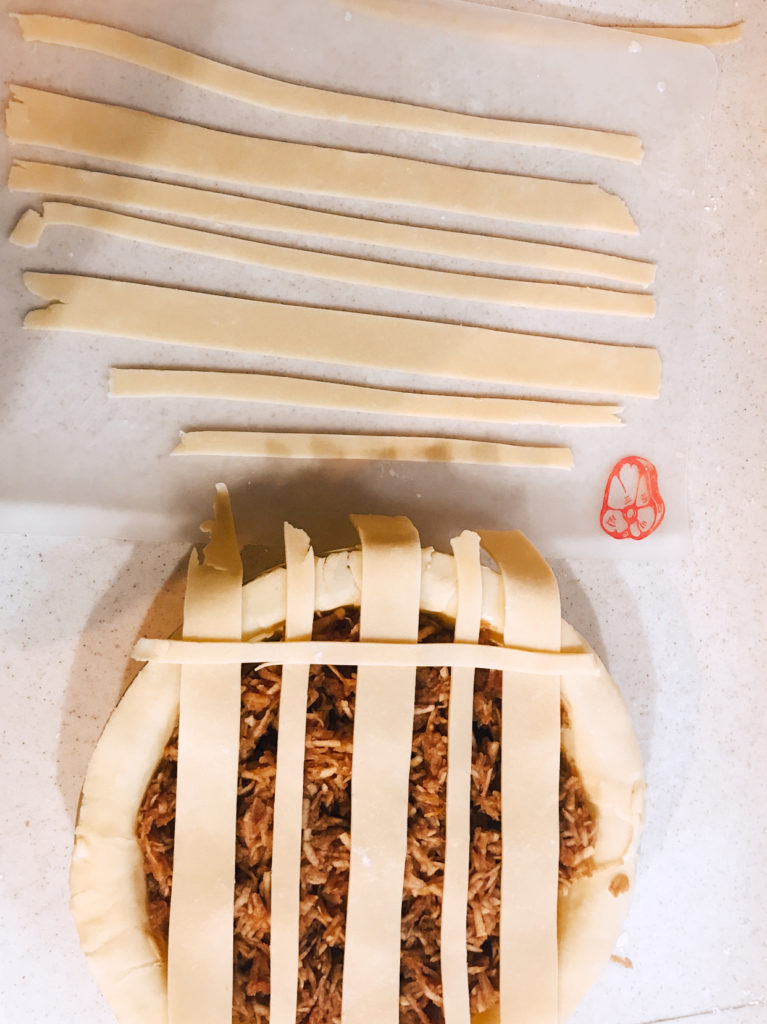
Roll out your pie dough in a rectangle. Once rolled slightly thinner than the base crust, grab that knife and slice 3 pinky finger thick pieces long-wise for the strands of your braided border. Cut more if needed to get ribbon long enough to make the rim of the pie. You can either braid into one long strand, placing in new strand under a top strand as you need more length, and then place on tray to refrigerate, or you can braid it right on the pie. First option is the easier and safer one. Next, cut 5 strands of 2 finger thick pieces. Make sure one of them can go the full length of the pie. Then cut the last small lattice pieces, 8 in total, making sure 2 can go the length of the pie.
Arrange the pieces across the pie like pictured above. Arrange the cross strands that are woven in the order they should be placed to make the process easier. Weave above and below every other strand for the cross strands. Once all placed, trim excess, heavily egg wash and then place your braid. The egg wash is your glue so be generous under the braid and lattice edges.
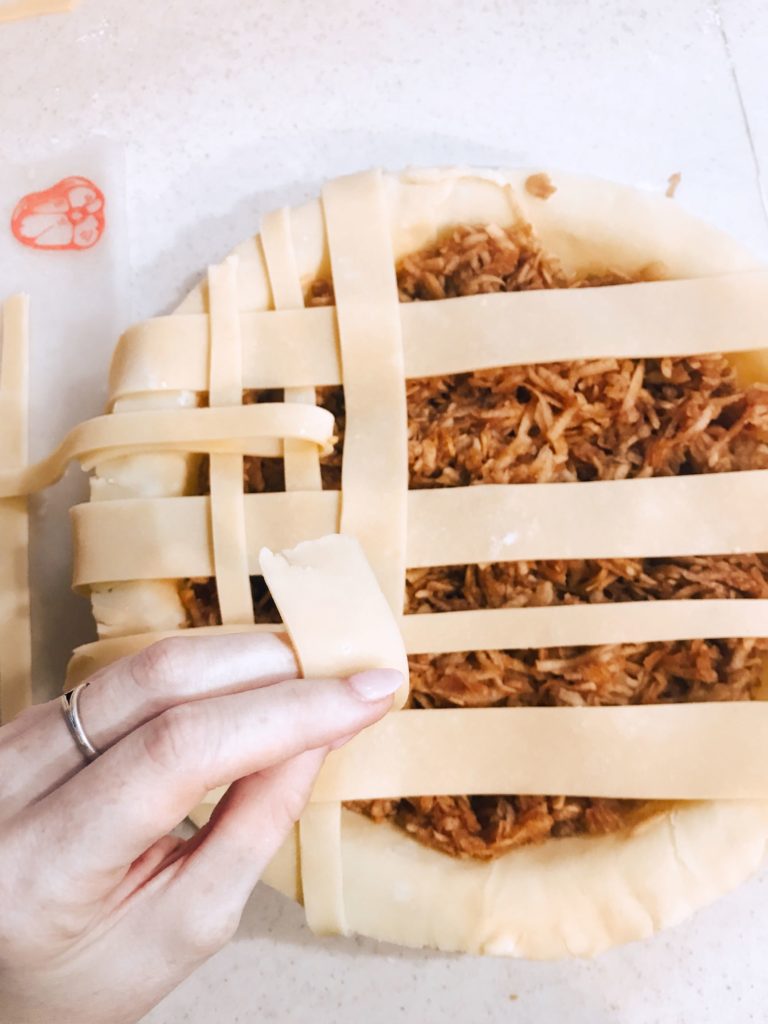
Pro Tip: Use a small rounded edge knife to smooth any rough edges around the braid and to straighten lattice pieces. Also, remember to refrigerate if anything gets too soft, especially with that long braid!
This pie style is a classic and one you can customize as much a you want. Add a braid across or more strips, maybe even cut leaves around the edge. Whatever you want to try!

Top-Crust Covering
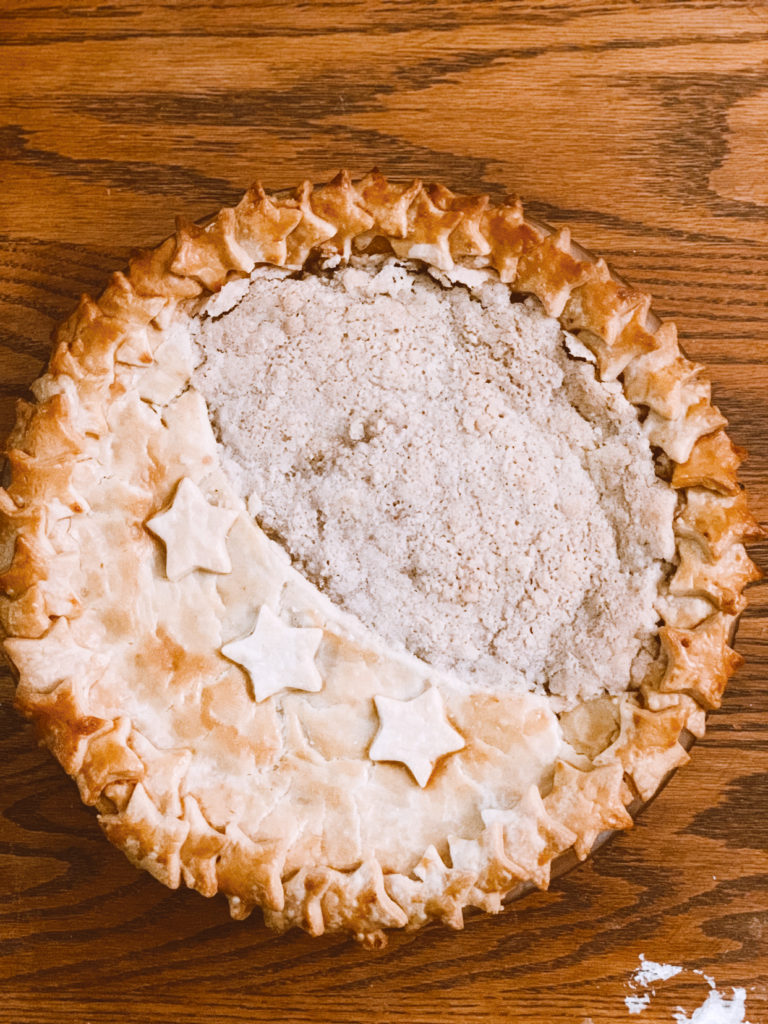
Roll out your extra dough to a circle slightly thinner than the base crust. Take your prepped pie and place on top of one corner like below and trace around with knife to cut. You are trying to get a piece half the size of your pan to cut to a crescent moon shape. Lay piece on pie once shaped to your liking.
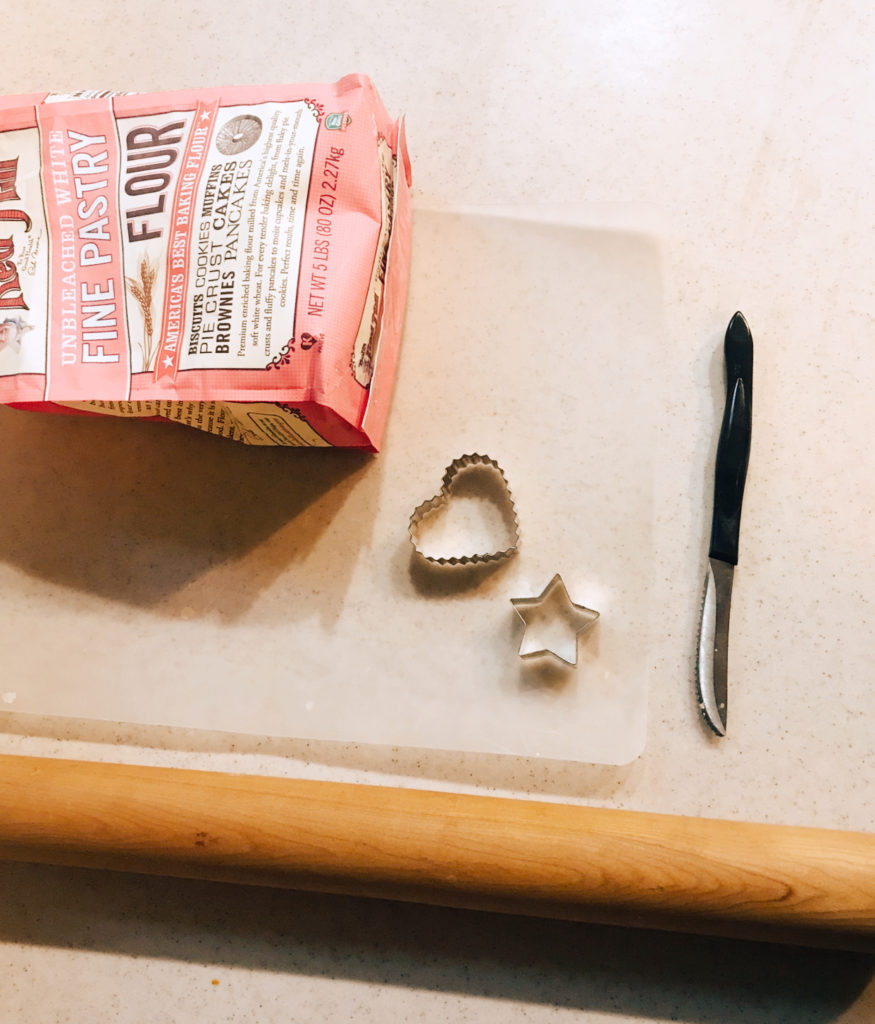
Next, find a cookie cutter about 1 inch in diameter. I used a star to keep with the theme. Cut about 25-30 pieces. Refrigerate if they start to loss their shape when cut.
Pro Tip: Use an egg white and cream mixture to first brush crust edge and then place star on top to ‘glue’ them. Egg yolk can also be used if you want a browned crust once cooked. I used egg white on all of these as I like a paler bake.
Once all stars are placed around edge, wash entire pie with egg wash to give it a shine once cooked. Add a strudel to the exposed pie if you want or leave exposed for a great color variation. This pie has a great simplicity about it yet feels unexpected which is really striking when displayed.
Powdered Sugar Design w/Dried Fruit
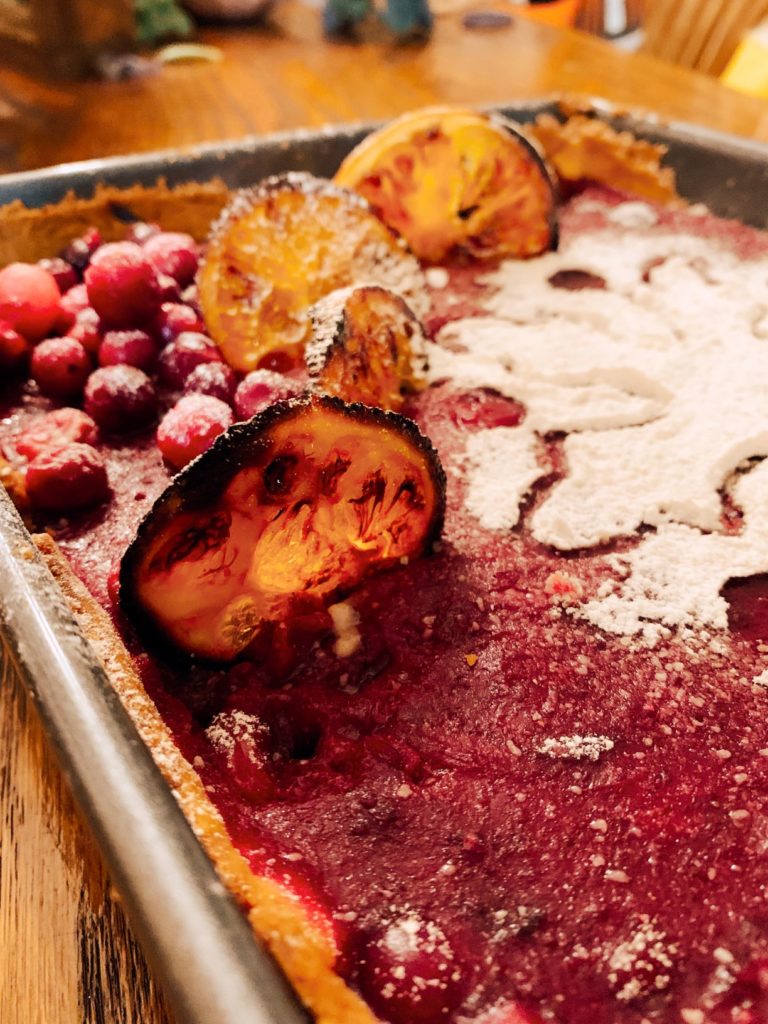
This is the easiest option as it is super quick and added after pie is fully cooked through. Choose a fruit of your choosing and cut in thin slices. Place on nonstick pan and sprinkle sugar across each slice. Place in a oven on 150 for 40 minutes, or until desired dehydration level reached.
While fruit is cooking, choose your cookie cutter. You can either trace shape onto paper so entire shape is shown, or just use the cutter itself for the outline. This is the option we chose as it is the simplest. Place shape on pie, put powdered sugar in mesh colander then move it over pie till desired coverage is reached. Once fruit is done, add in standing up to add great height and interest. This can also be dusted if wanted.
This decoration choice is best for tarts or pumpkin pies that have a flat top surface once set. It is a quick way to add a unique design and not present a plain pie.

Hope our 3 design ideas peaked your interest in pies! It is definitely a fun experiment and one that doesn’t take complicated steps to achieve beautiful results. Happy baking!